Side Imaging Fish Finders for Lake Reservoirs
Oh, the Illinois lake reservoirs! They're absolutely magnificent, offering some incredible fishing opportunities, but let's be honest, they can also be incredibly frustrating. You're out there, scanning endless stretches of water, knowing the fish have to be somewhere, but actually finding those elusive schools or hidden structures feels like searching for a needle in a haystack. This guide is all about cutting through that frustration, diving deep into how side imaging fish finders can transform your reservoir fishing experience, turning those vast, daunting waters into an open book.
Understanding Side Imaging Technology for Anglers
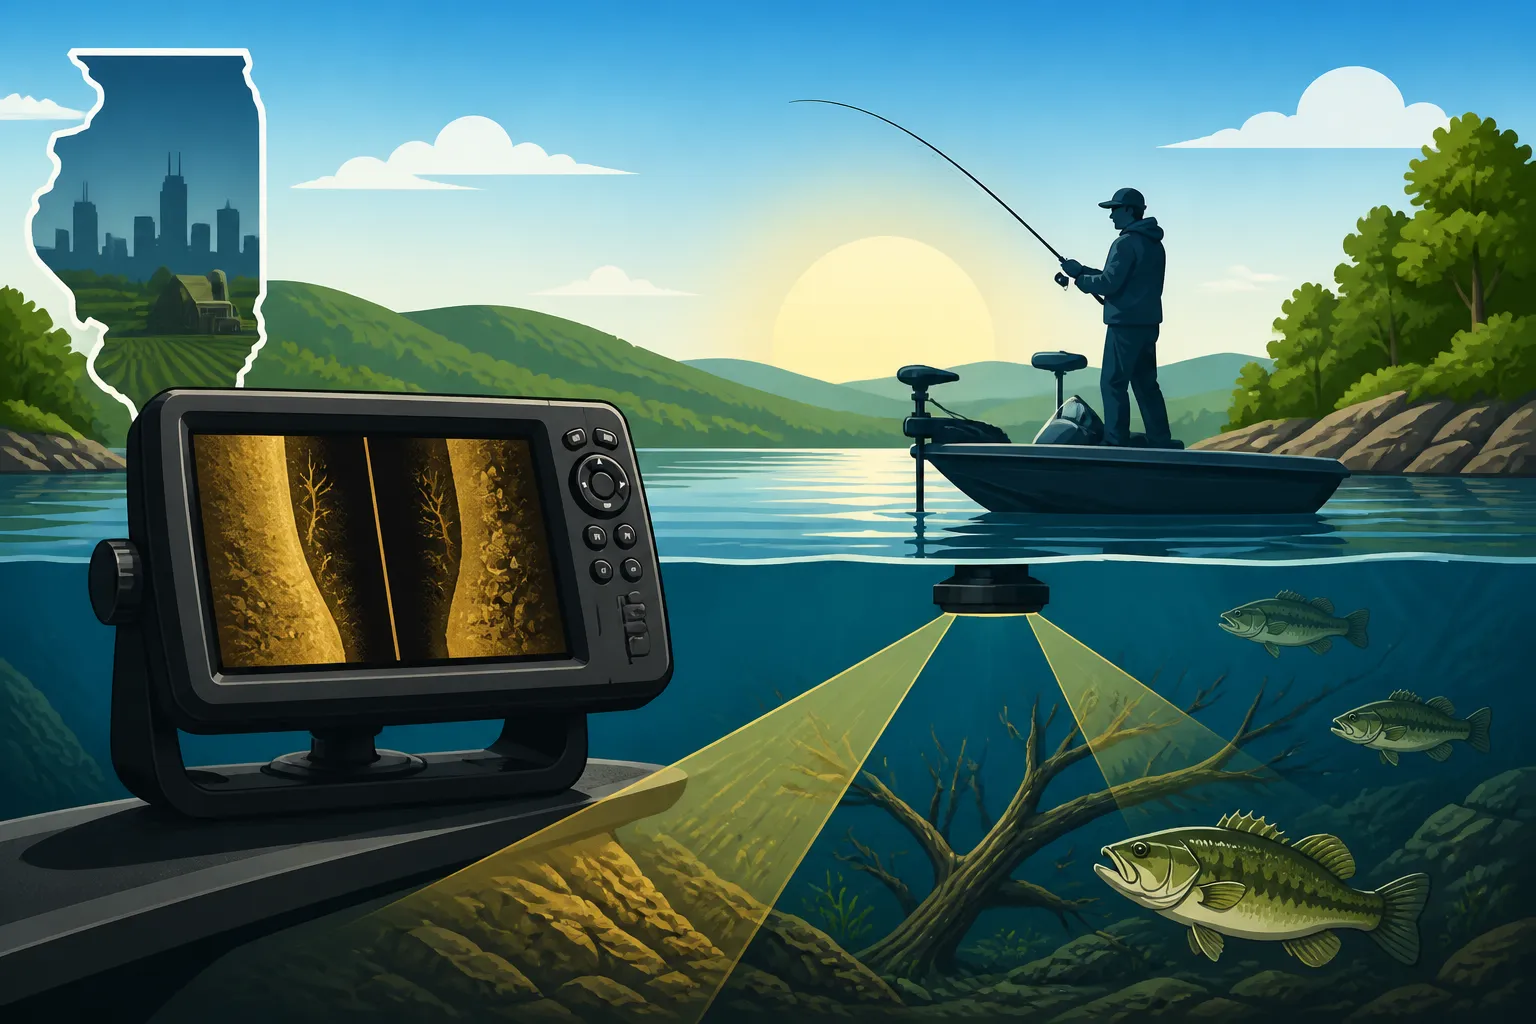
Let's start by demystifying what side imaging actually is. Forget the traditional down-looking sonar that gives you a narrow cone directly beneath your boat; side imaging is like attaching wings to that cone, letting it scan out to the sides, sometimes up to hundreds of feet on either side, in incredible detail. It's essentially sending out high-frequency sound waves in a thin, fan-shaped beam that sweeps out from your boat, painting a detailed picture of the bottom and everything in between on your screen.
Think of it like this: instead of looking through a straw straight down, you're now looking out your car window at the passing scenery. You can see the road shoulder, the ditches, fallen trees, and objects far to the left and right, all while you're moving forward. This makes it an absolute game-changer for understanding the underwater world beyond just what's directly below your hull.
How Side Imaging Sonar Works Its Magic
At its core, side imaging relies on sophisticated transducer technology. Unlike the single-beam or traditional dual-beam transducers, a side imaging transducer typically has multiple elements that emit very thin, high-frequency sound beams horizontally out from both sides of your boat. As these sound waves hit objects – be it a submerged stump, a rock pile, a school of baitfish, or even a lone trophy bass – they reflect back to the transducer.
The fish finder then uses the time it takes for the sound to return and the intensity of the returning echo to create a remarkably clear, photographic-like image on your display. Harder objects reflect more sound and appear brighter, while softer bottoms or shadows behind objects will appear darker. This ability to interpret shadows is crucial, as it gives the image its 3D-like quality, helping you understand the shape and size of underwater features, even fish tucked right up against cover. You're not just seeing blobs; you're seeing branches, tires, even individual fish distinct from the structure they're relating to.
The Clear Difference from Traditional Sonar
Traditional 2D sonar is excellent for seeing what's directly beneath you, showing fish arches and bottom contours. It's fantastic for vertical jigging or finding deep holes. Down imaging, a step up, provides a more photo-like view directly below, reducing the cone shape distortion and giving clearer images of structure and fish beneath the boat.
However, neither of these technologies gives you the expansive view that side imaging does. With traditional sonar, you might pass right over a brush pile 50 feet to your left without ever knowing it was there. With side imaging, that brush pile would pop up clearly on your screen, allowing you to mark it, turn around, and approach it directly. This drastically cuts down on unproductive searching, making your time on the water much more efficient. For serious anglers who want to find hidden gems, it's almost indispensable.
Why Side Imaging is a Game-Changer for Illinois Lake Reservoirs
Illinois is home to some fantastic lake reservoirs like Rend Lake, Lake Shelbyville, and Carlyle Lake, which offer incredible fishing, but also present unique challenges. These waters are often vast, full of varying depths, complex contours, and an abundance of submerged timber, rock piles, and artificial fish attractors that fish love to call home. This is precisely where side imaging really shines and earns its reputation as a must-have tool.
Think about those huge, sprawling waters. Without side imaging, you're basically guessing where to start, or relying on old knowledge, which might be outdated. With this technology, you're actively exploring, covering huge swaths of water quickly and efficiently, making your time on the water much more productive.
Uncovering Hidden Structure and Cover
One of the biggest advantages of side imaging on lake reservoirs is its ability to reveal hidden structure and cover that traditional sonar might completely miss. Reservoirs, by their very nature, were created by damming rivers, inundating old fields, forests, and even homesteads. This means they are often littered with stumps, standing timber, old roadbeds, foundations, and brush piles – all prime real estate for bass, crappie, and even walleye.
Imagine you're cruising along a featureless looking bank on Lake Shelbyville Fishing Guide. Your traditional sonar might show a flat bottom, but with side imaging, you might suddenly see an old fence line running parallel to the bank, or a cluster of submerged Christmas trees that someone dropped to create a fish habitat. These are spots you'd literally never find otherwise, yet they could be teeming with fish. This kind of detail is invaluable for breaking down large bodies of water and finding those productive micro-habitats.
Locating Fish Schools and Solitary Predators
It's not just about structure; side imaging is incredibly effective at locating fish themselves. While fish arches on traditional sonar are great, side imaging presents fish in a more realistic way, often appearing as small, bright dots or streaks, sometimes with their shadows trailing behind them. You can see schools of baitfish, like shad or minnows, huddled around a point, or even identify individual predatory fish, such as largemouth bass, cruising just outside a brush pile or suspended over a deep channel.
Picture yourself on Rend Lake's Best Spots for Trophy Bluegill Over a Pound. You're moving slowly, and suddenly, you see a tight ball of baitfish with larger, distinct returns lurking around the edges on your side imaging screen. That's a clear signal to slow down, drop a line, or switch up your presentation. This visual confirmation gives you immense confidence and directs your efforts to where the fish are actually present, rather than just where you think they might be.
Efficiently Scanning Large Areas
Reservoirs are big. Driving around with traditional sonar, waiting for a fish arch or a contour line to show up, can take forever. Side imaging drastically speeds up your search process. You can effectively scan a wide swath of water with each pass, often covering an area equivalent to two football fields on a single pass.
This means you can quickly eliminate unproductive water and focus your time and energy on areas that actually hold fish. If you're looking for a specific depth break or a channel swing that fish are using, you can zig-zag across a larger area, painting a comprehensive picture of the underwater terrain in minutes, not hours. For competitive anglers in tournaments, or anyone with limited time on the water, this efficiency is golden. This capability is especially useful when trying to understand Why Fishing Rules Vary by Lake and River as you can quickly adapt to the specific contours of a new body of water.
Key Features to Look for in a Side Imaging Fish Finder
Choosing the right side imaging fish finder can feel a bit overwhelming with all the options out there. However, by focusing on a few key features, you can narrow down your choices and find a unit that truly enhances your Illinois reservoir fishing trips. Brands like Humminbird and Garmin are very popular, often found at retailers like Bass Pro Shops and through online stores like Amazon.
Screen Size and Resolution
This is arguably one of the most important considerations for side imaging. You're trying to interpret detailed images, and a small, low-resolution screen makes that incredibly difficult. Look for the largest screen size you can reasonably fit on your boat and afford. Screens 7 inches or larger are generally recommended for side imaging, with 9, 10, or even 12 inches being ideal.
Resolution goes hand-in-hand with screen size. A higher pixel count (e.g., 800×480 pixels for a 7-inch screen is good, but 1024×600 or higher is even better) will provide much sharper, clearer images, allowing you to distinguish fish from structure more easily. It makes a real difference when you're trying to discern the subtle details of a brush pile or an old submerged boat.
Transducer Quality and Power
The transducer is the heart of your sonar system. For side imaging, you want a high-quality transducer that can emit strong, clear signals. Look for transducers with frequencies in the 455 kHz to 1.2 MHz range. Higher frequencies generally provide more detail and clearer images, especially in shallower water, but their range might be shorter. Lower frequencies can penetrate deeper and have a longer range, but with less detail. Many modern units offer multiple frequencies, allowing you to switch based on conditions.
The power output (measured in RMS watts) is also important. More power means the unit can send and receive stronger signals, which translates to better depth penetration and clearer images in varying water conditions. Don't skimp on the transducer; it's what generates the images you see.
GPS and Mapping Integration
A side imaging unit without good GPS and mapping capabilities is like having a powerful telescope without a star chart. Integration with GPS is essential for marking waypoints where you find structure or fish, creating routes, and navigating back to those productive spots. Most modern fish finders come with built-in GPS, but pay attention to the quality of the pre-loaded maps.
Many units, especially those from popular brands like Lowrance or Humminbird, come with detailed lake maps, often including contours, depth shading, and even satellite imagery overlays. The ability to create your own custom maps (often called "contour mapping" or "real-time mapping") is a huge bonus for reservoirs, as you can map out areas of interest in even greater detail as you explore them. This feature can be a godsend when you're trying to get back to that exact spot where you found Best Bass Lakes in Illinois, Ranked or pinpointed a school of fish.
Networking and Expandability
Consider how the fish finder integrates with other electronics on your boat. If you have multiple displays, a trolling motor, or an engine, a networkable unit can share data seamlessly. For example, you might want your front-mounted fish finder to display the same side imaging view as your console unit, or have your trolling motor's built-in sonar integrate with your main display.
Expandability refers to the ability to add accessories like radar, external GPS antennas, or even shallow-water anchors. While you might not need all these features initially, choosing a unit with networking capabilities ensures your system can grow with your needs down the line. This can be particularly useful for those considering advanced setups for Lake Michigan Salmon and Trout Fishing in Illinois or Illinois Muskie Gear and Tackle.
Ease of Use and User Interface
Even the most advanced fish finder is useless if you can't figure out how to operate it. Look for a unit with an intuitive user interface, easy-to-understand menus, and dedicated buttons for frequently used functions. While you'll definitely need to spend some time learning any new unit, a well-designed interface will make that learning curve much smoother.
Read reviews and, if possible, try to play with a demo unit in a store like Bass Pro Shops. Pay attention to how easy it is to switch between different sonar views (2D, down imaging, side imaging, map), zoom in and out, and mark waypoints. A complicated interface will only add frustration to your fishing trip.
Tips for Using Your Side Imaging Fish Finder Effectively on Reservoirs
Owning a side imaging fish finder is one thing; mastering its use on sprawling Illinois reservoirs is another. It takes practice, patience, and a bit of know-how, but once you get the hang of it, you'll wonder how you ever fished without it. Let's talk about some strategies to get the most out of your advanced sonar.
Adjusting Settings for Optimal Performance
The default settings on your fish finder are a good starting point, but they're rarely optimal for all conditions. The water depth, clarity, and bottom composition of Illinois reservoirs can vary wildly, so learning to adjust settings like sensitivity, contrast, and range is crucial.
- Sensitivity: This controls how strong of an echo the unit will display. Too low, and you'll miss faint returns; too high, and you'll get too much clutter. Start with an automatic setting and then dial it up or down until you get a clear image without too much noise.
- Contrast: Adjusting contrast helps differentiate between hard and soft targets. Increase it to make fish and hard structure pop, but be careful not to lose subtle details.
- Range: The side range setting determines how far out to the sides your sonar scans. In shallow reservoir coves, you might set it to 50 feet per side for maximum detail. In deeper, open water, you might push it to 100-150 feet per side to cover more ground. Adjusting this often is key to getting the right perspective for the water you're fishing.
Experiment with these settings on different types of structure and depth. There's no single "best" setting; it's about what works for the specific conditions you're encountering.
Developing a Systematic Search Pattern
One of the greatest strengths of side imaging is its ability to cover water efficiently. To leverage this, develop a systematic search pattern rather than just randomly cruising. For example, if you're targeting a point, start by making a few parallel passes along each side of the point, a cast's length or two out. This allows you to scan the slopes and surrounding areas for hidden structure or fish holding off the main point.
For large flats or submerged creek channels, try a grid pattern or long, overlapping passes. This ensures you cover the entire area without missing anything. As you scan, pay close attention to the bottom transitions, breaks in cover, or any isolated structure that appears on your screen. When you spot something promising, mark it with a waypoint. This is where your Fish Finder Buying Guide for Beginners knowledge really comes into play, as you'll learn to interpret the data effectively.
Interpreting Shadows and Structure
The shadows cast by objects on your side imaging screen are just as important as the objects themselves. A "shadow" is the area behind an object that the sonar beam can't reach. The length and darkness of this shadow can tell you a lot about the height and shape of the object. A tall, thin object like a standing timber trunk will cast a long, distinct shadow, while a low-lying rock pile will have a shorter, softer shadow.
Learning to interpret these shadows takes practice, but it's vital for understanding the true nature of what's beneath the surface. It helps you visualize the structure in 3D, allowing you to predict where fish might be holding (e.g., on the leeward side of a stump in current, or nestled tight against the base of a brush pile). This skill is particularly useful for finding those elusive fish hiding in complex areas often mentioned in guides like Best Fishing Spots in Illinois.
Marking Waypoints and Following Contours
Whenever your side imaging reveals a productive piece of structure, a school of fish, or an interesting contour line, mark a waypoint immediately! This is non-negotiable. Modern fish finders make this incredibly easy, often with a dedicated button. Once marked, you can easily navigate back to that exact spot, or create a route that follows a productive contour.
For reservoirs, following contours is a highly effective strategy. Fish often relate to specific depth breaks, old creek channels, or changes in bottom composition. Your side imaging, combined with detailed mapping, allows you to follow these subtle contour lines with precision, scanning both sides of your boat for fish and structure that might be holding them. This methodical approach is key to success on big, complex bodies of water and makes navigating back to promising spots a breeze. Don't forget to consider your Best Fishing Boat for Illinois Lakes when planning these trips, as the right vessel can make all the difference.
Integrating with Other Sonar Views
While side imaging is powerful, it works best when integrated with your other sonar views. Think of it as part of a complete picture. Use side imaging for broad scanning and locating potential targets. Once you've identified something interesting, switch to down imaging or traditional 2D sonar to get a more detailed view directly below your boat as you approach it.
For example, you might use side imaging to spot a brush pile 80 feet to your left. Once you've marked it and moved over it, switch to down imaging to see the brush pile directly beneath you and identify any fish holding vertically within it. Then, use traditional 2D sonar for precise bait presentation, watching your lure fall into the cover and seeing how fish react. Combining these views gives you the most comprehensive understanding of the underwater environment and fish behavior, greatly improving your chances for a successful outing on any of Illinois's wonderful reservoirs.
| Feature | Importance for Reservoir Side Imaging | Why It Matters |
|---|---|---|
| Screen Size | High | Larger screens (7"+) allow for better detail interpretation of wide scans. |
| Resolution (Pixels) | High | Higher pixel count means clearer, sharper images, easier fish/structure ID. |
| Transducer Quality | High | Essential for clear, powerful, and detailed side-scan signals. |
| Frequency Range | Medium-High | Multiple frequencies (455-1.2 MHz) offer versatility for depth/detail. |
| GPS/Mapping | High | Crucial for marking waypoints, navigating, and understanding reservoir contours. |
| Networking | Medium | Allows integration with other boat electronics (trolling motor, multiple displays). |
| User Interface | High | An intuitive interface speeds up learning and makes on-the-water adjustments easy. |
Disclaimer
This article is for general informational purposes only and does not constitute professional advice. Laws, prices and regulations vary by location and change over time. Consult a qualified professional for guidance on your specific situation.