Kayak Anchor Setup for Lake Fishing
Oh, the joy of kayak fishing on a serene Illinois lake! It's one of my absolute favorite ways to connect with nature and chase some lunkers. But let's be real, nothing derails that peaceful pursuit faster than constantly drifting off your perfect fishing spot, especially when a sudden gust of wind kicks up or a gentle current decides to push you around. If you've ever found yourself paddling against the elements just to stay put, you know the frustration. This guide is all about equipping you with a solid kayak anchor setup, so you can lock in on those prime locations and focus on what truly matters: catching fish.
Why a Kayak Anchor is Essential for Lake Fishing in Illinois
Imagine this: you've spent an hour scouting, carefully maneuvering your kayak into position, and your fish finder just lit up with a sweet school of crappie holding tight to a submerged brush pile on Lake Shelbyville. You drop your jig, feel that familiar tap, and then… whoosh. A gust of wind sweeps you ten feet off your mark, or a subtle current, perhaps from the Spillway, starts tugging you away. Before you know it, you're either frantically paddling, missing bites, or worse, drifting right over the very fish you were trying to catch. This isn't just annoying; it's a huge time-waster and can seriously cut into your fishing success. A reliable anchor system is the unsung hero of kayak fishing, giving you the control and stability you need to make the most of every cast.
Battling Wind and Current on Open Water
Illinois lakes, from the vast expanses of Carlyle Lake to the more intimate waters of Clinton Lake, are beautiful, but they can be surprisingly tricky. Open water means you're exposed to wind, and even a slight breeze can turn your lightweight kayak into a sail. Currents, though often less noticeable on lakes than rivers, can still be a factor, especially near inlets, outlets, or deeper channels. Without an anchor, you're in a constant battle, paddling and adjusting, which detracts from your focus on presentation and bites. Think of all those times you've had to reel in mid-cast to avoid drifting into the reeds or away from that promising drop-off. An anchor gives you the power to plant your kayak exactly where you want it and stay there, regardless of what Mother Nature throws at you. It’s about giving you the peace of mind to truly fish, rather than just floating.
Holding Your Spot Over Productive Structure
Fish love structure – it's where they hide, ambush prey, and find comfort. Whether it's a sunken tree, a rock pile, a weed line, or a contour change, being able to consistently present your bait to that structure is key. Without an anchor, hitting that sweet spot repeatedly is incredibly challenging. You might make one perfect cast, but then you've drifted a few feet, and your next cast lands just outside the strike zone. This is especially true when you're targeting finicky species like walleye or bass that might be holding tight to a specific piece of cover. By dropping anchor, you can dissect that structure with precision, making multiple casts from different angles to thoroughly work the area. This focused approach dramatically increases your chances of getting a bite, turning those "almost" moments into "fish on!" scenarios. Plus, it really helps when you're trying to figure out those Illinois Bass Pre-Spawn Fishing Patterns.
Types of Kayak Anchors: Choosing the Right One for Illinois Lakes
Just like there's no one-size-fits-all lure, there's no single perfect anchor for every situation. Your choice will depend on the type of bottom you're typically fishing, the water depth, and how much gear you want to carry. A good kayak angler knows their tools, and anchors are no exception.
Grapple Anchors: Versatility for Various Bottoms
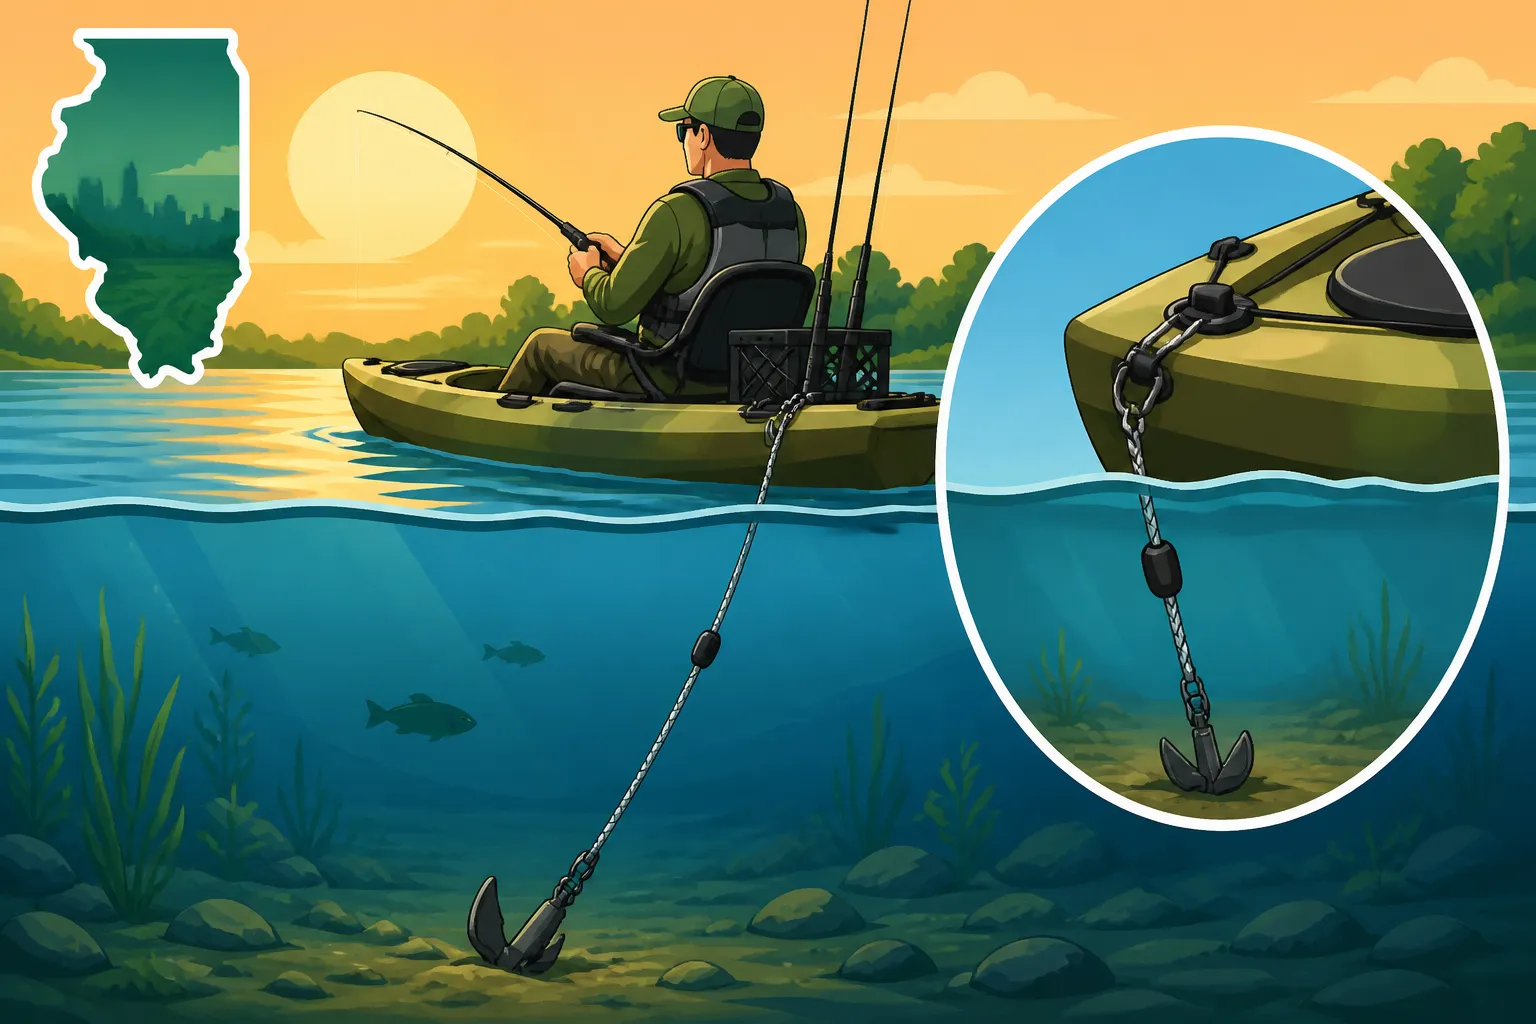
The grapple anchor, sometimes called a folding grapnel, is a popular choice among kayak anglers, and for good reason. Its four prongs extend out, designed to "grapple" onto structure like rocks, logs, or even thick weeds. This makes it incredibly versatile for many Illinois lakes which often have varied bottoms. If you're fishing a rocky section of the Mississippi River or an old timber-filled lake like Kinkaid Lake, a grapple anchor can really dig in and hold. When you're done, the prongs often fold up, making it fairly compact for storage in your kayak's hatch or strapped to the deck. They usually come in weights ranging from 1.5 to 3 pounds, which is generally sufficient for kayaks in most moderate conditions. Just remember that if it snags too well, you might need a release system or a strong pull!
Folding Anchors: Compact and Easy to Store
Similar to grapple anchors, folding anchors offer excellent portability. The key difference is often in the design of the "flukes" or prongs. Some folding anchors have broader, flatter flukes that are designed to dig into softer bottoms like sand or mud more effectively than a pure grapple. Others are essentially folding versions of traditional fluke anchors. Their main advantage is their compact nature. When folded, they take up very little space, which is a huge plus in a kayak where every inch of storage counts. These are fantastic if you're portaging your kayak a bit or just have limited room in your truck. Brands like Bass Pro Shops offer a variety of these, making it easy to find one that fits your setup. They might not hold quite as tenaciously in heavy current or over very jagged rocks as some other designs, but for general lake use, they're a solid, convenient option.
Mushroom Anchors: Best for Soft Mud and Sand
If you find yourself primarily fishing lakes with soft, muddy, or sandy bottoms, like parts of Rend Lake or areas of Lake of Egypt, a mushroom anchor might be your best bet. As the name suggests, it's shaped like a mushroom cap, designed to sink into soft substrates and create suction, providing excellent holding power. They typically come in slightly heavier weights for kayaks, often 5 to 10 pounds, because they rely on their shape and weight to embed themselves. The downside? They're not great for rocky bottoms, as they'll just roll around. They also aren't as compact as folding anchors, so storage might be more of a consideration. However, for sheer holding power in soft mud, they're hard to beat. Just imagine trying to stay put on a windy day over a flat, muddy point; a mushroom anchor will be your best friend.
Drag Chains/Stake-Out Poles: Stealth for Shallow Water
Sometimes, a traditional anchor isn't what you need, especially in very shallow water or when you want to make a quiet approach. This is where drag chains or stake-out poles shine.
- Drag Chains: A drag chain is simply a length of heavy chain, usually 5-10 feet long, that you can slowly deploy. It provides just enough drag to slow your drift considerably without completely stopping you. This is perfect for slow-trolling or drift-fishing a long weed line or a river bend. It's also less likely to snag than a traditional anchor and incredibly quiet. For shallow backwaters or when the fish are skittish, a drag chain from Amazon can be a really effective and stealthy tool.
- Stake-Out Poles: These are rigid poles, typically 6-10 feet long, made of fiberglass or aluminum. You simply push them into the soft bottom to literally "stake out" your kayak. They are incredibly silent, very effective in shallow mud or sand (up to about 6-8 feet deep, depending on the pole length), and provide instant, secure anchoring. If you're fishing shallow flats for bass or wading into a marshy area, a stake-out pole is invaluable. They take up more space to transport than a folded anchor, but for specialized shallow water fishing, they are the gold standard. Just make sure the bottom is soft enough for it to penetrate, or you'll just bounce off!
Here's a quick comparison of common kayak anchor types:
| Anchor Type | Best For | Pros | Cons | Typical Kayak Weight |
|---|---|---|---|---|
| Grapple/Folding | Mixed bottoms (rocks, weeds, mud) | Versatile, compact, good holding | Can snag on heavy cover, less grip on pure mud | 1.5 – 3 lbs |
| Mushroom | Soft mud, sand | Excellent holding in soft bottoms, simple | Poor on hard/rocky bottoms, bulky, heavier | 5 – 10 lbs |
| Drag Chain | Slow drifts, light currents, mixed bottoms | Stealthy, minimizes snagging, adjustable | Doesn't fully stop kayak, requires longer chain | Varies by length |
| Stake-Out Pole | Very shallow (up to 8 ft) soft mud, sand | Silent, instant hold, no rope needed | Only works in shallow soft bottoms, bulky to transport | N/A (pole length) |
Essential Components of a Kayak Anchor System
An anchor isn't just the hunk of metal at the end of a rope. A truly effective kayak anchor system involves several key components that work together to maximize safety, convenience, and functionality. Cutting corners here can lead to lost anchors, tangled lines, or even dangerous situations.
Anchor Rope and Line Management
The rope itself is critical. You'll want marine-grade rope that's resistant to UV rays and saltwater (even for freshwater lakes, it's a good practice for durability) with a breaking strength well beyond what you'd expect to need. The length is also important; a good rule of thumb is to have at least 3-5 times the maximum depth you plan to fish. So, if you're regularly fishing in 15 feet of water, you'll want at least 45-75 feet of rope. This "scope" allows the anchor to lie flatter on the bottom and dig in properly, providing much better holding power than if you drop it straight down.
Managing that rope on a kayak is another challenge. Loose line can become a serious hazard, tangling around your feet, gear, or even your paddle. That's why good line management is essential. An anchor cleat or a dedicated line winder is a must-have. Some kayaks even come with small recessed areas or cleats designed specifically for anchor lines. You can also use a small mesh bag or a specialized anchor reel to keep your line tidy. Always coil your line neatly or use a winder to prevent tangles and ensure a smooth, quick deployment. You don't want to be fighting a knot when a school of fish appears on your Best Fishing Spots Near Chicago, Illinois sonar!
Quick Release and Safety Considerations
Safety should always be paramount, especially when anchoring in current or heavily trafficked waters. A quick-release system is non-negotiable for kayak anchoring. This allows you to rapidly detach your anchor line from your kayak if you get into trouble – perhaps the anchor gets hopelessly snagged, or a large boat wake pushes you into danger. The simplest quick-release system is often just tying a non-permanent knot (like a bowline) to a carabiner or a dedicated quick-release clip, and then attaching that to a secure point on your kayak or an anchor trolley.
Alternatively, some anglers prefer to simply cleat their rope off and have a sharp knife or line cutter readily accessible. Whichever method you choose, make sure you can release your anchor instantly and without fumbling, even under stress. Getting pulled under by a snagged anchor is a real danger, so knowing how to quickly ditch your anchor is a skill every kayak angler should master. Remember, the anchor is just a tool; your safety is the priority.
Anchor Trolleys: The Game-Changer for Kayak Anglers
If there's one piece of anchor system gear that revolutionizes kayak fishing, it's the anchor trolley. This simple but brilliant system allows you to position your anchor line anywhere along the length of your kayak, from bow to stern, without having to physically move the anchor itself. Think about it: without a trolley, your anchor is usually tied to a single point, typically the bow or stern. If the wind changes, or you want to adjust your angle to the structure, you have to pull up the anchor, paddle around, and drop it again. It's a lot of work.
An anchor trolley consists of a loop of rope or line running along one side of your kayak, through a series of pulleys at the bow and stern. Your anchor line then attaches to this loop via a ring or carabiner. By pulling on the trolley line, you can slide your anchor attachment point forward or backward. This means you can anchor off your bow to face directly into the wind, or off your stern to fish a specific bank, or even off the side to drift-fish perpendicularly to a weed line. It gives you incredible control over your kayak's position and orientation, especially important when battling currents on the Mississippi River Catfish Fishing in Southern Illinois or trying to stay precisely over a bass bed. Installing one can seem a little daunting at first, but it's one of the best upgrades you can make to your kayak fishing setup.
Setting Up Your Kayak Anchor System Step-by-Step
Alright, so you’ve got your anchor and your line, maybe even a fancy anchor trolley. Now, how do you put it all together and get it working for you on the water? It's all about method and practice.
Basic Stern or Bow Anchoring
Let's start with the simplest setup: just dropping anchor directly from either the bow (front) or stern (back) of your kayak.
- Choose Your Anchor Point: Decide if you want to anchor from the bow or the stern. Bow anchoring is generally safer and more stable, especially in wind or current, as your kayak will face into the elements, reducing its tendency to spin. Stern anchoring can be useful for specific presentations, but it can be less stable and increases the risk of swamping in rougher conditions if waves come over the back. For most lake fishing, I recommend starting with the bow.
- Measure Your Line: Before you even leave the launch, ensure your anchor line is long enough. A good rule of thumb is to have 3-5 times the maximum depth you plan to anchor in. If you're fishing a 20-foot deep spot, you'll want 60-100 feet of rope. This "scope" helps the anchor dig in and hold better.
- Find Your Spot: Paddle to your desired fishing spot. Use your fish finder to pinpoint structure, or simply observe the shoreline for promising features.
- Position Upwind/Upcurrent: Paddle a bit past your spot, then turn your kayak to face into the wind or current. This allows you to drift back slowly over your target, giving you time to deploy the anchor correctly.
- Deploy the Anchor: Gently lower the anchor into the water. Don't just throw it in! Letting it free-fall can tangle the line or scare fish. Slowly pay out the line as you drift backward over your spot.
- Secure the Line: Once you've drifted into position and feel the anchor dig in, cleat off the line or secure it to your quick-release system. Make sure there's enough tension for the anchor to hold, but not so much that it pulls free. You might need to adjust the line a few times to get it just right.
- Check Your Hold: Give a gentle tug on the line to confirm the anchor is set. If you're still drifting, you might need to pull it up, paddle a bit further upwind/upcurrent, and try again, paying out more scope this time.
Installing an Anchor Trolley System
Installing an anchor trolley might sound like a big project, but it’s quite manageable and definitely worth the effort. There are many kits available from retailers like Bass Pro Shops or Amazon that come with everything you need.
- Gather Your Tools: You'll typically need a drill, a screwdriver, marine-grade silicone sealant, and maybe a measuring tape. Your kit should include pulleys, padeyes (small loops that screw into the kayak), a ring or carabiner, and the trolley line itself.
- Plan Placement: Decide which side of your kayak you want the trolley on. Most right-handed anglers prefer it on the left (non-paddling) side, but it's a personal preference. Position the padeyes near the bow and stern, leaving enough room for the pulleys to operate freely without interfering with other gear or your paddle strokes.
- Drill and Mount: Carefully mark your drill points. Use a drill bit slightly smaller than your screws. Apply marine-grade silicone sealant to the holes before inserting the screws and tightening the padeyes. This helps prevent water intrusion.
- Thread the Line: Run the trolley line through the pulleys and secure the ends, creating a continuous loop. Some kits use knots; others might have small crimps.
- Attach the Ring: Thread the ring or carabiner onto the trolley line loop. This is where your anchor line will attach.
- Test It Out: Once installed, test the trolley by pulling on the line to move the ring from bow to stern. Make sure it moves smoothly and doesn't snag anywhere.
Now, when you go to anchor, you'll attach your anchor line to that ring, drop your anchor, and then use the trolley line to move your anchor point to any position along your kayak's side, giving you unparalleled control. It's truly a game-changer for angling, letting you easily adjust your position when trying to fish those productive Lake Shelbyville Walleye Spots Anglers Overlook.
Best Practices for Deployment and Retrieval
Even with the best gear, proper technique makes all the difference.
- Controlled Deployment: Always lower your anchor, never throw it. This prevents tangles, keeps it quiet, and ensures it sets properly.
- Optimal Scope: As mentioned, use enough anchor line (3-5x depth) to give your anchor room to dig in. Too little scope means the anchor pulls straight up and won't hold.
- Anchor Off the Bow (Generally): For stability and safety, especially in wind or current, anchoring off the bow is usually best. If you have an anchor trolley, this means sliding the ring to the bow once the anchor is set.
- Look for Natural Aids: Sometimes, you can use natural features to your advantage. If there's a submerged log or a thick patch of lily pads, you might be able to momentarily hold your position using your paddle or even your hand while you prepare your anchor.
- Upcurrent/Upwind Approach: Always approach your desired spot from upcurrent or upwind. This allows you to drift back into position as you deploy your anchor, making the process smoother and more precise.
- Retrieval: To retrieve, paddle or pull yourself directly over the anchor. This reduces the scope and makes it easier for the anchor to dislodge from the bottom. If it's snagged, try pulling from a different angle. Sometimes paddling a circle around the snagged anchor can free it. If you have a quick-release system, and the anchor is truly stuck, you may have to cut your losses for safety reasons.
- Clean and Store: Once retrieved, clean any mud or debris from your anchor and coil your line neatly. Store it securely so it doesn't become a tripping hazard or fly out of your kayak during transport. A mesh bag or dedicated anchor storage container keeps things tidy and prevents damage to your kayak or other gear. You don't want a muddy anchor making a mess of your Tackle Box Setup for Illinois Species!
By following these tips, you'll find that anchoring your kayak becomes a smooth, efficient part of your fishing routine, allowing you to maximize your time on the water and, most importantly, catch more fish!
Disclaimer
This article is for general informational purposes only and does not constitute professional advice. Laws, prices and regulations vary by location and change over time. Consult a qualified professional for guidance on your specific situation.