How to Rig a Jig for Bass Fishing
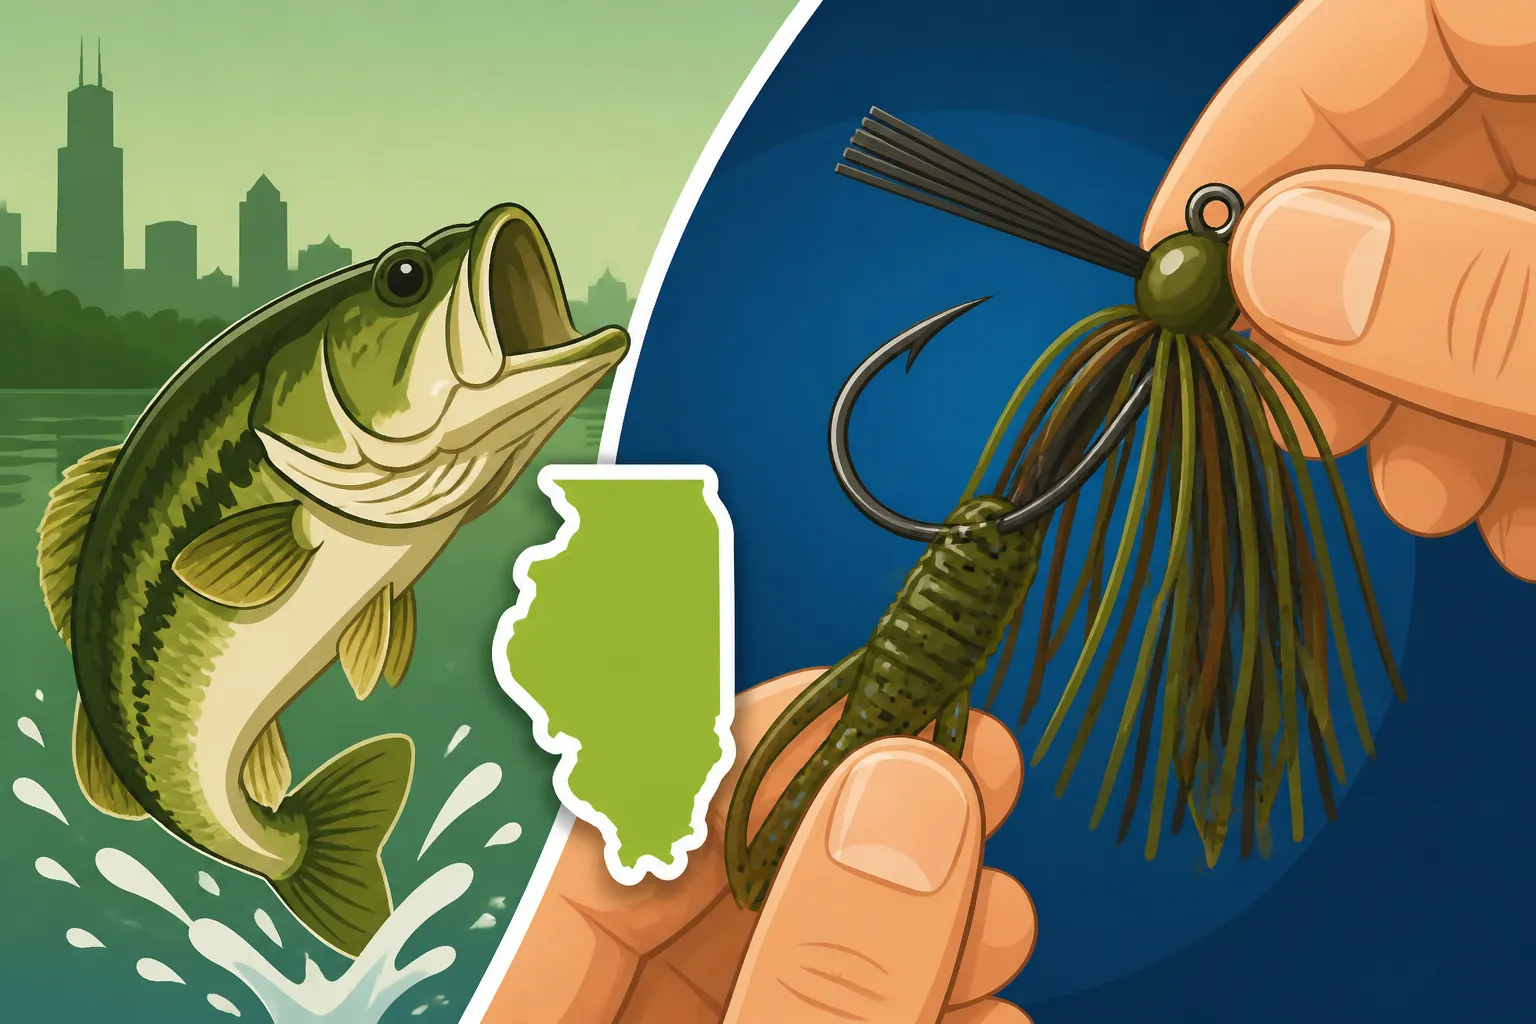
If you've ever felt the frustration of watching other anglers pull in bass after bass while your traditional worm or spinnerbait isn't getting any love, it might be time to shake things up. Jigs, while sometimes intimidating to rig correctly, are absolute bass magnets, offering a subtle yet powerful presentation that can turn a slow day into an epic one. This guide will walk you through everything you need to know about rigging a jig for bass fishing in Illinois, helping you master this incredibly versatile technique.
Understanding Bass Jigs and Their Appeal
Let's face it, sometimes it feels like bass have seen every trick in the book. They get wary, especially in heavily pressured waters common across Illinois. That's where a properly presented jig shines. It’s not just another lure; it's a finesse tool that can imitate a crawfish, a baitfish, or even a bluegill scurrying along the bottom, making it an irresistible meal for a hungry bass.
Why Jigs Are So Effective for Bass
Jigs are incredibly effective because they offer a combination of subtle action and a substantial profile that bass find hard to ignore. Unlike many lures that have a constant, predictable movement, a jig's action is entirely dictated by the angler. You can hop it, drag it, swim it, or let it sit motionless, mimicking a variety of natural prey behaviors. This versatility allows you to adapt to the bass's mood and environmental conditions, whether they're aggressive or lethargic.
The weight of a jig allows you to target specific depths with precision, getting right into the strike zone where bass are holding, often in dense cover. Plus, the combination of a jig head and a soft plastic trailer provides a realistic look and feel that encourages bass to hold on longer, giving you more time to set the hook. This often leads to better hook-up ratios compared to some other reaction baits.
Common Types of Bass Jigs
The world of bass jigs can seem a little overwhelming at first, but once you break down the main categories, it becomes much clearer. Each type is designed for a specific purpose and scenario, making them highly specialized tools in your tackle box. Understanding these differences is key to choosing the right jig for the conditions you're facing.
First up, we have Flipping and Pitching Jigs. These are characterized by their compact heads, often with a pointed or bullet shape, and a stout, heavy-wire hook designed to penetrate the thick mouths of bass through dense cover. They typically feature a strong weed guard that helps them slide through grass, brush, and laydowns without snagging. These jigs are ideal for targeting specific pieces of cover up close, making them perfect for fishing around docks, lily pads, or submerged timber in lakes like Lake Shelbyville.
Then there are Casting Jigs, which are more general-purpose and can be fished in a wider variety of situations. Their heads might be rounder or more football-shaped, designed to maintain contact with the bottom and deflect off rocks. These are great for covering water and fishing deeper structure, where you're looking to crawl or drag the jig along the bottom. They’re excellent for probing ledges and drop-offs, especially during the colder months when bass tend to hold deeper.
Swim Jigs are a breed apart. These jigs typically have a hydrodynamic head design that helps them move smoothly through the water, often resembling a small baitfish. They usually come with a thinner, less obstructive weed guard or sometimes no weed guard at all, allowing for a more fluid swimming action. Swim jigs are meant to be retrieved steadily, mimicking a baitfish darting through the water, making them lethal when bass are keying in on shad or other forage fish. They're particularly effective in open water or around sparse cover where bass are actively hunting.
Finally, Football Jigs are easily recognizable by their wide, football-shaped heads. This design makes them incredibly stable on the bottom, allowing them to crawl over rocks and gravel without tumbling or snagging. They're superb for fishing offshore structure, deep ledges, and rocky points, where their head design ensures maximum bottom contact and helps them feel every nuance of the terrain. The wide head also encourages the jig to stand up when at rest, presenting the trailer in a natural, defensive posture. Knowing when and where to deploy these different jig types is the first step in unlocking their full potential.
Essential Components for Rigging a Bass Jig
Rigging a bass jig isn't just about tying a knot; it's about matching several components to create a cohesive presentation. Each part plays a crucial role in how the jig looks, feels, and moves in the water, directly influencing its effectiveness. Getting these elements right can make all the difference between a frustrating day and a successful outing.
The Jig Head Itself
The jig head is the foundation of your entire presentation, and its characteristics are paramount. First, consider the weight. Jig weights typically range from 1/4 ounce for shallower water or more finesse presentations, up to 1 ounce or even heavier for deep water or punching through heavy mats of vegetation. Matching the weight to the depth, current, and density of cover is critical for maintaining bottom contact and feeling those subtle bites. Too light, and you lose feel; too heavy, and it might fall too fast or snag too easily.
Next, the hook size and quality are non-negotiable. Bass jigs often come with robust, sharp hooks designed to handle aggressive strikes and powerful fish. For flipping and pitching jigs, you’ll typically find heavy-wire hooks that can withstand the force required to pull a big bass out of thick cover. Ensure your hooks are needle-sharp right out of the package or give them a quick sharpen if needed. A dull hook can cost you a trophy fish.
The weed guard is another vital feature, especially for jigs fished in cover. Made of multiple strands of stiff plastic or fiber, the weed guard's purpose is to deflect snags while still allowing the hook to penetrate on a bite. Some weed guards are denser and stiffer for heavy cover, while others are sparser for more open water or finesse applications. You might even trim a few strands to adjust the stiffness, making it easier for bass to collapse the jig and get to the hook.
Lastly, the skirt material provides the jig with its lifelike action and bulk. Most modern jig skirts are made of silicone or living rubber, which pulsate and flare in the water, mimicking the legs of a crawfish or the fins of a baitfish. The color of the skirt is also critical, ranging from natural tones like green pumpkin and black/blue for mimicking crawfish, to brighter colors for stained water or specific baitfish patterns. Sometimes, a subtle splash of accent color, like chartreuse or orange, can make a jig stand out in murky conditions.
Choosing the Right Trailer
The trailer is what truly brings your jig to life. It’s the soft plastic appendage that attaches to the jig head, adding bulk, action, and profile. Think of it as the "dessert" that makes your jig an irresistible meal. The right trailer can dramatically enhance the jig's effectiveness, making it look more like a crawfish scuttling away, a baitfish swimming, or a creature trying to hide in the weeds.
For a crawfish imitation, which is often the go-to for jig fishing, soft plastic craws or creature baits are excellent choices. Brands like Strike King and Zoom offer a huge variety of craw trailers that feature flapping claws and multiple appendages, creating a lot of water displacement and lifelike movement. When bass are feeding on crawfish, especially in rocky areas or around hard bottom, a realistic craw trailer is hard to beat. You can often find a wide selection of these versatile plastics on platforms like Amazon, allowing you to experiment with different sizes and colors to match local forage.
If you're looking to imitate a baitfish, fluke-style trailers or small swimbaits are perfect. These usually have a paddle tail or a tapered body that provides a tight wiggling action as the jig is retrieved. For swimming jigs, a matching swimbait trailer can create a seamless, natural presentation that fools even the most cautious bass. Experiment with colors that match the local baitfish, such as silver, white, or shad patterns.
For a more subtle, finesse presentation, particularly when bass are sluggish or in clear water, chunk trailers or compact worms can be highly effective. Chunk trailers are typically rectangular or blocky pieces of soft plastic that add a compact profile and a bit of flapping action without being overly aggressive. Smaller, straight-tail worms or grub bodies can also be used as trailers, offering a very subtle movement that’s perfect for cold fronts or when bass are heavily pressured. Sometimes, simply finding the right brand or style of trailer is just a few clicks away on Amazon, with options from brands like Yamamoto or Gary Yamamoto Custom Baits readily available. The key is to match the trailer's size and action to the jig's weight and the desired presentation.
Line and Rod Selection for Jig Fishing
Your line and rod are the direct connection to your jig and, hopefully, to the bass. Making the right choices here is crucial for feeling subtle bites, powerful hooksets, and effectively battling fish in cover. This isn't a one-size-fits-all situation; different jig techniques call for specific setups.
For most jig fishing, especially when you're flipping and pitching into heavy cover or dragging football jigs on the bottom, braided line is often the top choice for many Illinois anglers. Braid offers zero stretch, which translates into incredible sensitivity, allowing you to feel every tap, tick, and bump the jig makes. This sensitivity is paramount for detecting light bites that bass often deliver on a jig. Furthermore, the lack of stretch provides maximum power for setting the hook and hauling big bass out of dense vegetation or timber. A common setup involves 30-65 lb braided line, depending on the cover. However, a drawback of braid is its visibility. In clear water or when bass are particularly wary, you might consider tying a 15-20 lb fluorocarbon leader to your braid using a strong knot like the FG knot, which allows you to maintain sensitivity while offering a more discreet presentation.
Alternatively, fluorocarbon line is another excellent choice for jig fishing, particularly for casting jigs or when fishing in clearer water where invisibility is key. Fluorocarbon is nearly invisible underwater, has low stretch (though more than braid), and offers good abrasion resistance. Its density also helps jigs sink slightly faster and stay closer to the bottom, which can be an advantage. A 15-20 lb fluorocarbon mainline is a popular option, providing a good balance of strength, sensitivity, and stealth. Brands like Seaguar and Berkley offer excellent fluorocarbon lines that perform well for jig presentations.
When it comes to rod selection, you'll generally want a baitcasting setup with a fast action and medium-heavy to heavy power. A fast action means the rod bends mostly in the tip section, providing the sensitivity needed to detect subtle bites and the quick responsiveness for accurate casting and hooksets. A medium-heavy to heavy power rod gives you the backbone to drive a heavy-wire hook through a bass's jaw and to wrench it out of thick cover. For flipping and pitching, a longer rod (7' to 7'6") provides better leverage and casting distance, while a slightly shorter rod (6'8" to 7'0") might be preferred for more precise casting or open-water jigging. Consider something like a St. Croix Bass X or a comparable model you might find on Amazon to ensure you have the right tool for the job. Matching your rod, reel, and line to your chosen jigging technique will significantly improve your success rate and overall fishing experience.
Step-by-Step Guide to Rigging Your Bass Jig
Rigging a bass jig might seem like a small detail, but doing it correctly ensures your presentation is flawless, increasing your chances of getting bites and landing fish. It’s all about attention to detail to make your jig look as natural and enticing as possible to a hungry bass.
Attaching the Trailer
Properly attaching your soft plastic trailer is crucial for the jig's action and presentation. The goal is to make the trailer an extension of the jig, creating a seamless, lifelike profile. Start by taking your chosen soft plastic trailer, whether it's a craw, chunk, or swimbait. Locate the flat side of the jig head where the hook shank emerges.
Now, align the trailer with the hook. You want to insert the hook point directly into the center of the trailer's head. Push the trailer onto the hook shank until it's snug against the jig head. Many jigs have a small keeper barb on the hook shank, designed to hold the trailer in place. Make sure the trailer slides past this keeper for a secure fit. The trailer should sit straight on the hook, not twisted or bent, which could impede its action or make it look unnatural. For craw-style trailers, some anglers prefer to orient the claws so they face upwards, mimicking a defensive crawfish, while others like them facing downwards for a more natural swimming or scuttling motion. Experiment to see what the bass in your favorite Illinois fishing spot prefer. For example, if you're fishing in the backwaters of the Mississippi River, bass might be keying in on crawfish, so a defensive posture could be more effective.
Tying the Jig to Your Line
Once your trailer is securely attached, the next critical step is tying the jig to your fishing line. A strong, reliable knot is absolutely essential, as jigs are often fished in heavy cover where line integrity is tested. For jig fishing, two knots stand out for their strength and reliability: the Palomar knot and the Improved Clinch knot.
The Palomar knot is often considered one of the strongest and easiest knots to tie, especially for braided lines, making it a favorite for jig fishermen. To tie it, double about six inches of line and pass the loop through the eye of the jig. Tie a simple overhand knot with the doubled line and the tag end, making sure the jig hangs freely. Then, pass the jig through the large loop you just created. Moisten the line, pull the tag end and the standing line simultaneously to tighten, and trim the tag end. This knot creates a strong, direct connection.
The Improved Clinch knot is another excellent choice, particularly for fluorocarbon and monofilament lines. Thread the line through the eye of the hook, then wrap the tag end around the standing line five to seven times. Pass the tag end back through the first loop closest to the eye, then back through the larger loop created by the wraps. Moisten the line and pull tightly on the standing line while holding the tag end to cinch the knot down. Both of these knots provide a secure connection that will give you confidence when you're fighting a big bass. Always double-check your knot before making your first cast.
Adjusting Your Setup for Different Conditions
Being able to adapt your jig setup to changing conditions is a hallmark of a successful angler. Bass behavior can shift dramatically with factors like water temperature, clarity, and pressure. Understanding how to tweak your jig will keep you catching fish when others are struggling.
One of the most immediate adjustments you can make is changing the jig weight. If you're fishing in shallower water (under 5 feet) or through sparse cover, a 1/4 to 3/8 ounce jig might be perfect, allowing for a slower fall and more natural presentation. However, if you move to deeper ledges or thick mats of vegetation, you’ll need to bump up to a 1/2 ounce or even a 3/4 ounce jig to ensure it gets down quickly and penetrates the cover effectively. The goal is to always maintain contact with the bottom or cover without snagging excessively. This is particularly important during the colder months when bass often hold deeper, and a heavier jig helps you stay in the strike zone. You might be interested in learning more about the specific tactics for winter bass fishing.
Trailer color and size are also critical. In clear water, natural colors like green pumpkin, watermelon, or black and blue (mimicking bluegill or crawfish) are usually best. However, if the water is stained or muddy, vibrant colors like black and blue, chartreuse, or even white can make your jig more visible and help bass locate it. The size of your trailer should also match the forage. If bass are feeding on smaller crawfish or baitfish, a compact 3-inch craw trailer is ideal. If they're keying in on larger prey, a 4-inch or even 5-inch creature bait might be more effective. You can often find a wide array of trailer options, including specific sizes and colors, on Amazon to stock up for various scenarios.
Finally, don't overlook your weed guard adjustments. If you're constantly getting snagged in very heavy cover, your weed guard might be too sparse, or the strands might be too soft. You can buy jigs with stiffer weed guards or even add more strands if you're a DIY angler. Conversely, if you're getting bites but failing to hook up, the weed guard might be too stiff, preventing the hook from penetrating. In this case, carefully trim a few strands off the weed guard to soften it, making it easier for the bass to collapse the jig and for you to set the hook. These small adjustments can significantly impact your success, allowing you to adapt to whatever the lake throws at you.
Mastering Jig Presentations and Techniques
Rigging a jig is one thing, but knowing how to fish it is where the real magic happens. Jigs are incredibly versatile, allowing for a multitude of presentations that can tempt bass in almost any situation. It's about understanding when to use each technique and how to execute it effectively.
Flipping and Pitching Jigs
Flipping and pitching are precision casting techniques designed for targeting specific pieces of cover up close, making them indispensable for jig fishing. These techniques allow you to drop your jig silently into tight spots where bass love to hide, such as under docks, around fallen trees, or into dense vegetation mats.
With flipping, you’re using the rod to pendulum the jig to its target with a short amount of line out, typically no more than the length of your rod. It’s a very quiet entry that minimizes splash, which is crucial for not spooking wary bass in close quarters. Pitching involves a slightly longer cast, where you let out a bit more line and use a gentle underhand motion to propel the jig to the target. Both methods prioritize stealth and accuracy, allowing your jig to enter the water with minimal disturbance.
Once your jig is in the target zone, the presentation begins. Let it fall naturally, paying close attention to your line for any twitch or jump—this often signals a bite on the fall. Once it hits the bottom, you can impart action by lightly shaking your rod tip, causing the skirt and trailer to pulse and twitch. Lift the jig a few inches, let it fall, or drag it slowly over submerged branches or rocks. The key is to keep it moving subtly, mimicking a crawfish or creature trying to hide. Bass will often strike when the jig hits bottom or on the very first twitch. This technique is a must-have for exploring prime bass habitat, especially in the spring and fall.
Casting and Dragging Jigs
While flipping and pitching target precise spots, casting and dragging jigs are all about covering water and systematically working larger areas, particularly deeper structure. This technique is highly effective for locating bass that are holding on points, humps, ledges, or shell beds.
When casting, you'll typically make a longer cast than with flipping or pitching, aiming for your target structure. Let the jig sink to the bottom on a semi-slack line, again watching for those tell-tale twitches that indicate a bite on the fall. Once it reaches the bottom, the drag becomes the primary action. You’ll slowly pull the jig across the bottom using your rod, rather than reeling it in. Think of it as feeling your way across the underwater terrain. You’ll feel every rock, log, and change in composition.
After dragging the jig a foot or two, let it sit for a few seconds. This pause can be incredibly effective, as it often prompts a bass that's been following to finally commit. Then, slowly lift your rod tip to pull the jig again, or give it a short hop before letting it settle back down. The rhythmic drag-and-pause, punctuated by subtle hops, is what makes this technique so deadly. It mimics a crawfish foraging along the bottom or a baitfish trying to hide among the rocks. This method is particularly useful when bass are relating to offshore structure and during times like the post-spawn period when bass might be scattered.
Swimming Jigs for Active Bass
Unlike their bottom-dwelling counterparts, swimming jigs are designed to be retrieved through the water column, mimicking a fleeing baitfish. This makes them an excellent choice when bass are actively feeding on shad, minnows, or other small forage fish. If you're looking for a more aggressive presentation, the swim jig is your friend.
The technique itself is fairly straightforward. Make a cast, often parallel to a weed line, a bank, or a submerged grass flat. Allow the jig to sink to your desired depth – usually just above the top of the cover or in the mid-water column where baitfish are present. Then, begin a steady retrieve, much like you would a spinnerbait or a shallow-running crankbait. The key is to keep the jig moving, letting the paddle tail or split tail trailer do its work, creating a vibrant, lifelike swimming action.
You can vary your retrieve speed, adding occasional twitches or pauses to make the jig appear more erratic, like a wounded baitfish. Often, bass will smash a swimming jig, so be ready for a solid strike. This technique is particularly effective in stained water where bass rely more on vibration and profile, or during periods when bass are actively chasing schools of baitfish. Knowing when to switch from a bottom-hugging jig to a swimming jig can dramatically increase your catch rate, especially when conditions call for covering more water and targeting active fish.
Jig Fishing in Challenging Illinois Conditions
Illinois weather and water conditions can be notoriously fickle, posing unique challenges for anglers. But with the right jigging approach, you can still find success even when the bass seem uncooperative. The key is understanding how to adjust your presentation to match the mood of the fish.
Cold fronts are a classic bass killer. After a cold front passes, bass often become lethargic and move to deeper water or denser cover. During these times, a slow, deliberate jig presentation is crucial. Opt for a heavier jig (like a 1/2 or 3/4 ounce football jig) to maintain bottom contact in deeper areas. Focus on dragging the jig incredibly slowly, with long pauses. Sometimes, a full 10-15 second pause after a short drag is what it takes to trigger a bite from a reluctant bass. This mimics a sluggish crawfish that's easy prey. Darker colors like black and blue or dark green pumpkin often perform well under these conditions, as they create a strong silhouette against the deeper water. If you're looking for more guidance on specific strategies, our guide on how to catch bass after a cold front might prove useful.
Clear water presents a different challenge. Bass in clear water have excellent visibility and can easily discern unnatural presentations. This calls for a more finesse approach. Downsize your jig to 3/8 or 1/4 ounce, and opt for natural, translucent trailer colors like green pumpkin, watermelon, or smoke with subtle flakes. Using fluorocarbon line or a fluorocarbon leader is highly recommended for its invisibility. Focus on quieter presentations, like a gentle pitch rather than a splashy cast. The action should be subtle—less aggressive hopping and more slow dragging and soft shakes. Our article on Best Bass Lures for Clear Water provides additional insights that can be paired with your jig strategy.
Conversely, heavy cover, whether it's thick lily pads, submerged timber, or dense hydrilla mats, demands an aggressive jigging approach. This is where your heavy flipping and pitching jigs shine. Use braided line (50-65 lb test) to rip bass out of cover, and ensure your jig has a stout, sharp hook and a strong weed guard. Don't be afraid to use heavier weights (3/4 to 1 ounce) to punch through thick vegetation. The presentation here is often a vertical drop into small holes in the cover, followed by sharp hops or short drags. The idea is to irritate the bass into striking defensively. Sometimes, a bright, contrasting skirt color might get a reaction in the shadows of heavy cover. Understanding the specific bass fishing techniques for different conditions will give you a significant edge on Illinois waters.
| Jig Type | Best Application | Ideal Trailer Types | Typical Weight Range | Best Conditions |
|---|---|---|---|---|
| Flipping/Pitching | Dense cover (docks, laydowns, mats) | Craws, creature baits (compact) | 3/8 – 1 oz | Heavy cover, tight spaces, ambush points |
| Casting | General purpose, moderate cover, open water | Craws, grubs, compact creature baits | 1/4 – 3/4 oz | Varied structure, searching for fish |
| Swim Jig | Open water, sparse cover, weed lines | Paddle tail swimbaits, fluke-style trailers | 1/4 – 1/2 oz | Active fish, baitfish imitation |
| Football | Deep rocky points, ledges, hard bottom structure | Craws, wider profile creature baits, chunk trailers | 1/2 – 1 oz | Offshore structure, feeling bottom contour |
Disclaimer
Fishing conditions and regulations in Illinois can change. Always consult the latest Illinois Department of Natural Resources (IDNR) fishing guide for the most current rules, regulations, and license requirements before heading out on the water. This guide is for informational purposes only.